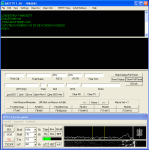
Dxbase AXETTY ver 1.20 program

using the MMTTY Engine version 1.68a

Designed and made by Joe WA6AXE


To use AXETTY 1.20:

(1) Anywhere on your C: drive, create a "New Directory" entitled:    AXETTY
-- I created my new directory, in my DXbase "Main" Directory.

NOTE!! :: Do NOT use your existing MMTTY directory that you have the
full-version of MMTTY in -- or, ANY other directory that you have the
full-version of MMTTY in ... !!! Make sure you create a NEW Directory!!!
To have this version work properly - this is very important!!!!

(2) Go to the MMTTY website - and -

  • (a) Put your mouse over the MMTTY link on the left side of the webpage - then
  • (b) Click-on the MMTTY-Home link in the Menu that is now shown.
  • (c) To HELP you with any questions about the basic MMTTY program itself, scrolldown
    to the words under the TITLE of MMTTY Help and click-on the LINK entitled:
    "MMTTY PDF Help File download zip file - 18mb". Save the ZIP file into the directory
    that "you created" in (1) above.

    (3) Scrollupwards to the words entitled:    MMTTY Engine Ver. 1.68a
    Click-on the LINK that says "Download from the Programmers Download Page".
    Now, go to the words that say "MMTTY Engine - MMTTY Engine V1.68a (MMTTY_Engine166g.zip 720KB)"
    and, Click-on the actual LINK by clicking-on the words "MMTTY Engine V1.68a".

    (4) Save the ZIP file into the directory that "you created" in (1) above.

    (5) Extract ALL of the files from the ZIP files - into the directory that
    "you created" in (1) above.

    (6) Go to the bottom of this webpage and download the AXETTY120.zip file -
    save this ZIP file into the same directory as in (5) above.

    (7) Extract the one file from the AXETTY120.zip file - and, save it into
    the same directory as in (5) above.


    (8) The new directory that you created should have the following files in it:

    MMTTY PDF Help v166G.zip
    MMTTY Help v166G.pdf

    MMTTY_Engine168a.zip
    MMTTY.EXE
    RemMFC.exe
    engine.txt
    License.txt
    Terms.txt
    Source.zip

    AXETTY120.zip
    AXETTY.exe


    (9) You can DELETE the MMTTY PDF Help v166G.zip, MMTTY_Engine168a.zip, Source.zip,
    and AXETTY120.zip files from your new directory - as you will not need them after this. And, you
    can also DELETE the RemMFC.exe and engine.txt individual files - as they are not used for AXETTY.

    (10) Note:    Make sure that you download the Version 1.68a of the
    Engine - as this "is" the most current version - and is the version that this
    AXETTY is built-on.

    (11) Run/Open the AXETTY.exe file.

    (12) Immediately pull the AXETTY/MMTTY Engine screen out of your way; and,
    go to Main Menu / Settings / General Setup...

    (13) Fill-in your CALLSIGN - and, make a selection for each of the five OPTIONS.
    Click "OK"

    (14) Go back to Main Menu / Settings / MMTTY Setup... Go to each of the 7 TABS,
    and make your selections for each of the OPTIONS. Click "OK"

    (15) Go to MMTTY engine's Main Menu / View(V) / -- and, select the XY Scope.

    (16) OPEN your DXbase program. The AXETTY program logs directly into your DXbase
    program - WITHOUT the need of the MMD 6.0 program!

    (17) NOTE:    This AXETTY program can be run as an AFSK "Soundcard" program - or, with the use of the EXTFSK (mmtty website) - you can setup to run FSK keying on XMIT.

    (18) Now - is FUN time .. just simply play around with the AXETTY program!!
    You CAN resize the windows -- separate the Engine's panel display from the rcve/xmit window
    and, literally place the windows wherever you want them on the monitor.
    You CAN select (Main Menu / MMTTY View - or the BUTTONS) whether you want to see the FULL engine
    panel or just the Display only as totally separate windows. CAUTION: the
    Full Panel and the Display only ARE "always on top"!!

    NOTE! : Once you place either the Full Panel or just the Display Panel onto
    the AXETTY main program's window, you can use the button titled "Q-Dock" (Quasi-Dock)
    to place the Panel "somewhat" into the AXETTY window. Remember that the
    AXETTY and MMTTY Engine are in fact two separate programs. Once you MOVE the
    AXETTY program's window, the Panel will "Un-Q-Dock" so that you can place it
    where you want - again.

    Note! : There are now 4 complete SETS of 12 MACRO buttons - giving you
    48 MACROs. The <<< Home >>> buttons will scroll-thru the 4 SETS.

    (19) NOTE:    Once you run/open the AXETTY program for the first time,
    you will start to notice that there will be THREE (3) extra files (in the AXETTY directory)
    that are being automatically created:

    MMTTY engine creates:

    Mmtty.ini and UserPara.ini files


    AXETTY creates:

    Settings.dat


    Special NOTE! : Once these ini and dat files are created, there is
    no reason to ever have to delete them. When you download an updated
    AXETTY.exe file - you simply let this exe file over-write the old version.
    If you DO DELETE these ini and dat files - you WILL also be deleting
    your MACROs and ALL SAVED info. So, PSE - do NOT delete the ini and dat
    files.


    (20) NOTE:    the buttons on the AXETTY program titled as F1 through F12
    are transmit "memories" or MACROs. Right click on the button and the macro dialog
    window will show up ... the auto-turnoff of the transmit is keyed-on the symbol

    \

    or the keyword 'stop'


    (21) For those DXbase users who RUN AXETTY from a DESKTOP shortcut/icon:

    AXETTY was made as a standalone program - to be run
    from your desktop. The one thing that you must fill-in
    to make AXETTY run properly from this shortcut/icon is:

    When you make the DESKTOP Shortcut/ICON - be sure that you
    fill-in the "Target:" and also the "Start In:" textboxes

    The following LINK will show my own setup for running
    AXETTY from the DESKTOP:

    http://www.navycthistory.com/wa6axe/axetty112B.gif

    This is "only an example" of my own setup .. yours
    will be different -- just use the example to know
    what TWO fields to fill-in.


    (22) For those DXbase users who want to RUN AXETTY from with DXBASE:

    AXETTY was made as a standalone program - to be run
    from your desktop.

    But - yes, you can run AXETTY from within the DXbase
    program. There are just a couple of things that are
    mandatory if you do this:

    (1) When you make the Main Menu / Programs / Customize
    entry -- you MUST fill-in "BOTH" of these lines of info:

    Command:

    and

    Initial Directory:

    The following LINK will show my own setup for running
    AXETTY from within DXbase:

    http://www.navycthistory.com/wa6axe/axetty112.gif

    This is "only an example" of my own setup .. yours
    will be different -- just use the example to know
    what TWO fields to fill-in.

    The Initial Directory info will allow the AXETTY
    program to "find" where the MMTTY.ini and Settings.dat
    files are located. This will allow the proper execution
    of your MACROs and the Q-Dock operations.

    (2) Make sure that you EXIT out of the AXETTY program
    "before" you EXIT out of DXbase.


  • AXETTY version 1.20